If you haven’t had a chance to check out the Internet resources that are offered by the Aurora Public Library, check them out. They offer several great search engines and activities.
When you go to their main page, you’ll see Picture-It! | Type-It! | Book Lists | E-Reader | Homework Help | Fun Sites.
Picture-It! enables students to narrow their search for media by providing pictures clues along the way. This is a great support for beginning readers and English Language Learners.
Type-It! provides the standard search features for finding media. It includes clear examples of how to initiate a search.
Book Lists provides a concise listing of some of the best books available. The list is even arranged by reading level. This is a perfect page for students, parents and teachers alike.
E-Reader this is THE site! It contains hundreds of books that students can read in lots of languages. So for example if you happen to have new student from Croatia and you’re thinking, “Now where can I get some books for my students that are written in Croatian?” Well this is the place. But wait. There’s more. There are also actors reading stories aloud.
Here’s the breakdown:
Tumble Books: Listen to a story in English, Spanish, or French.
International Children’s Library: Enjoy books from all over the world.
BookPALS Storyline Online: See and hear famous actresses and actors read great stories.
StoryPlace: Hear stories in English or Spanish
These brief descriptions do no justice to these great sites. Be sure to check them out. While you are exploring these sites be sure to explore Homework Help and Fun Sites too.

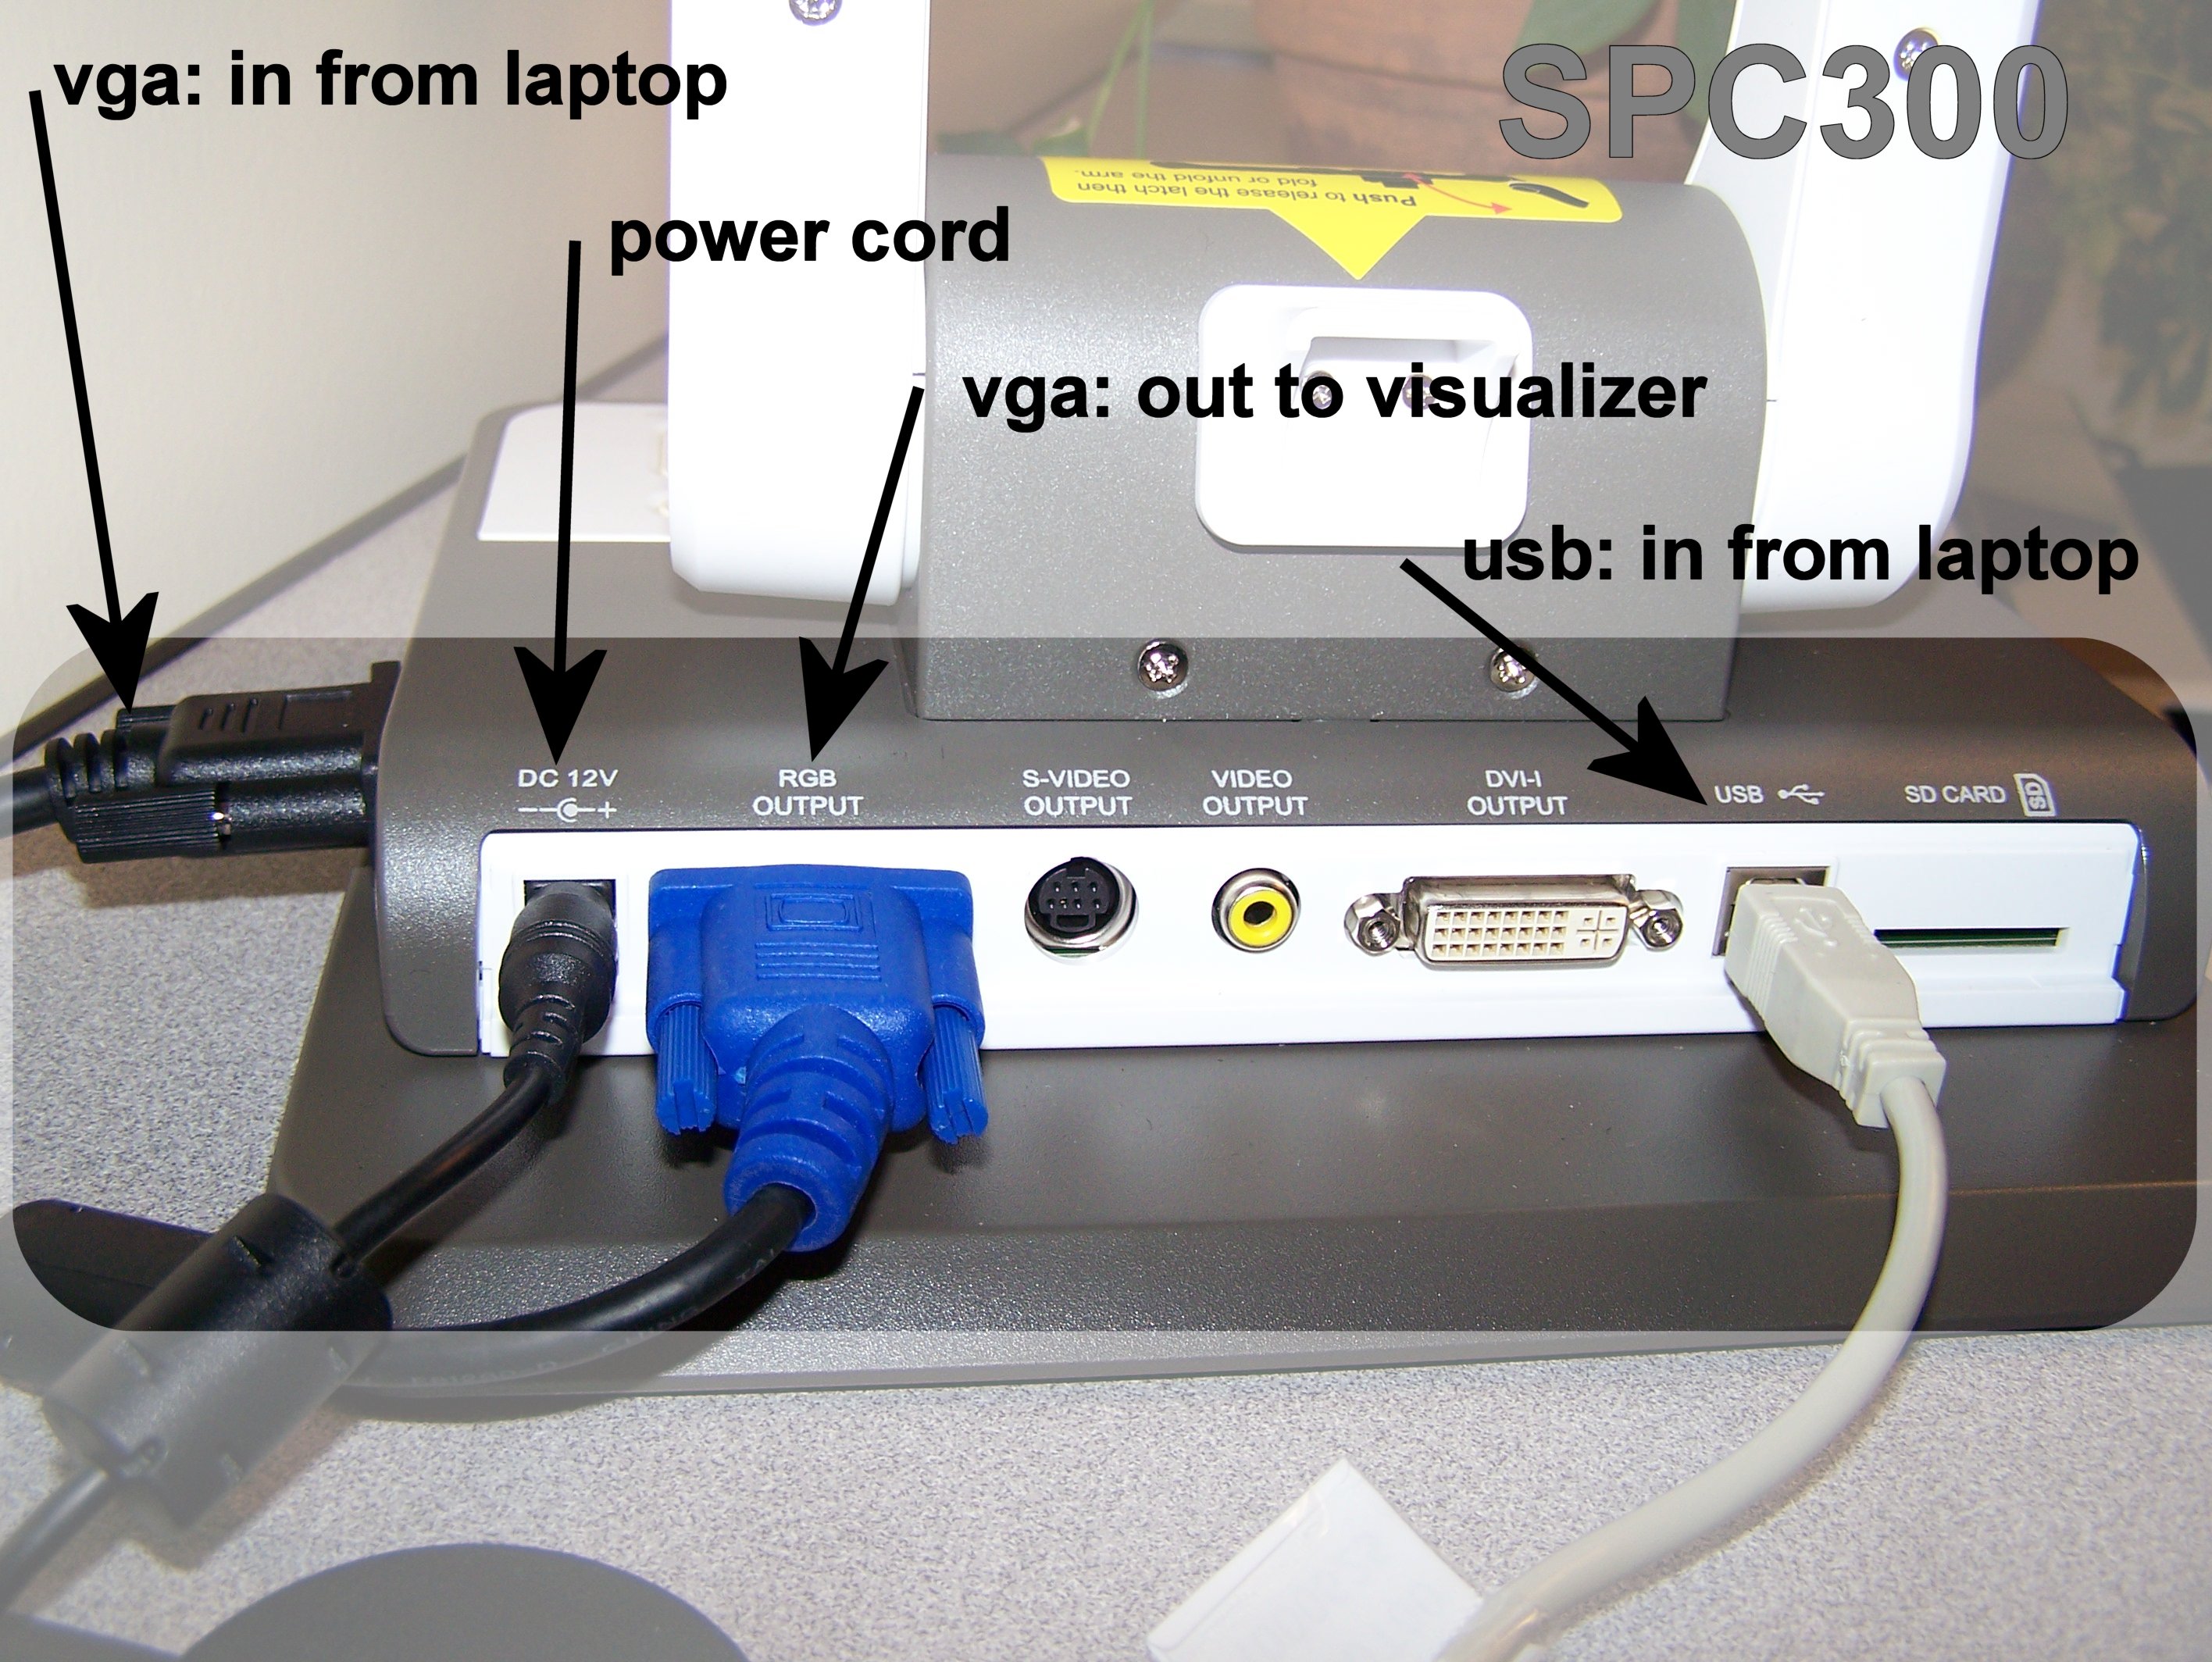
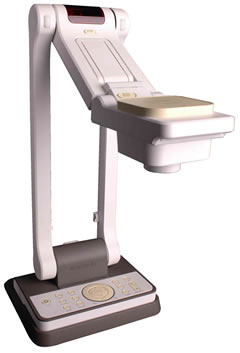 Today I was using a visualizer and it was soooooo fuzzy. I just couldn’t get it to focus. Then I noticed one little cable curving its way in and then out of the visualizer’s view… that was it. Once I moved it out of the way and pressed AF (auto focus) again, it worked!
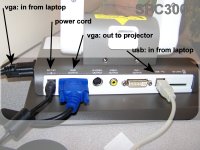 If you have the new SPC300 visualizer (document imaging camera) by Avermedia, here is a diagram that you can use for setting up the cables. When the visualizer is set up this way, you can switch between your computer and the visualizer by using the buttons on the visualizer. Press camera to project the visualizer. Press source to project the computer. Set up this way you can leave your projector alone. This is especially helpful if you have a projector mounted on the ceiling.


