Do you have old GX260’s in your classroom that feel like more trouble than they are even worth? What about student computers (desktop, laptops, and netbooks) that frequently need to be re-imaged due to the ever present tinkering that helps students understand and use technology systems.  You know the students (young and older), they figure out how to delete or hide the toolbar, but haven’t yet figured out how to restore it. Rather than trouble-shooting each challenge that arises, it is much easier to restore the operating system back to the state you originally intended, than to trouble-shoot each issue.
Well now there’s a device that enables you to load a computer with all sorts of educational applications in under 5 minutes! Not only that, but if a student tinkers with the computer to the point that it needs to be restored you can give it a soft or hard reset in about 5 seconds. YES! Within 5 seconds you can have computer back to working order. In fact you don’t even need the thumbdrive to restore the computer. Imagine the time that you will save at the end of the year when you are preparing the computer for a new cadre of learners!
 This stick is truly uber. It goes above, over, around, and across computers to provide students faster, more stable, virus immune, sustainable and more importantly, educational digital platforms. The uberstick can extend the life of your computers beyond their District Supported life span. After using the uber stick on a small form GX260 in my office it was able to startup in under 1 minute. That means 1 minute to actually be ready for you to start clicking on application icons. That’s a huge difference compared to the 15 – 20 minutes it used to take to be ready to use. It even runs Google Earth smoothly. Google Earth!
The uberstick is a 1.9 gb thumbdrive that re-images netbooks, laptops and desktops. It installs ubuntu 10.04 netbook edition loaded with educational applications such as ActivInspire, Google Earth, graphic organizers, Virtual Microscope and much more. It has been customized to meet the needs of many students and to work on most computers in Aurora Public Schools. It has been successfully tested on both small and large form GX260s, GX270s and GX280s. As well as Latitude D630 laptop and the Latitude 2100 & 2110 netbooks.
How do I get it?
To get an uberstick to try out on computers in your classroom, interoffice mail a 2gb (or larger) thumbdrive to Christopher EarthTree at ESC 1 – 113. Be sure to put your name and location on a sticky note so I know who to send it back to.
Why Open Source?
Here’s an excerpt from Saugus Union School District’s web site explaining why they choose this operating system.
- Linux is thinner and lighter than Windows, which makes it faster and more efficient on lower powered netbooks.
- By using free, open-source software we are able to provide students with a far broader selection of applications to use without cost or limitation.
- Linux provides for far greater customization, as well as the creation of simpler interfaces that are easier for students and teachers to use and manage.
- Innovative storage options enable rapid recovery from system problems, eliminating the need to “secure” or “manage” the machines.
- Linux is not prone to spyware, malware, or other malicious software that plagues Windows-based systems.
- We are able to distribute the same applications students use on their netbooks to parents for installation on home computers, regardless of the operating system, enabling ubiquitous technology access and empowering parents with the opportunity to learn with and assist their children with technology-driven activities.
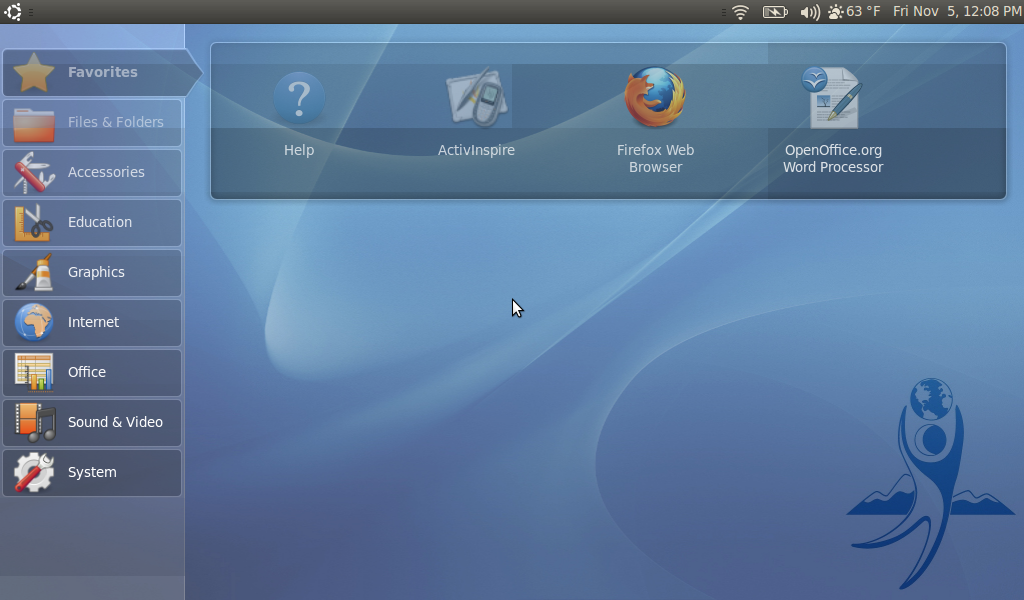
One of our goals for this project was to try to make using a netbook as simple and reliable as a cell phone, so that our teachers wouldn’t have to spend time teaching students operating systems and students could get right to using them for creative projects.  For our netbooks, we are using a customized install of Ubuntu Netbook Edition. As you can see below, the interface is quite simple and attractive (click the image for a larger view):
How do I re-image a computer (netbook, laptop, desktop)?
Installing on your System
Instructions for booting a system from a USB key will vary from system to system, so you will want to consult the manual that came with your system if the following instructions do not work for some reason.
Warning: If your netbook has never had the ubermix installed on it, this process will erase everything on your netbook. If there is anything on it that you want to keep, you will want to back it up prior to performing the following steps. As of version .65, netbooks that already have ubermix .65 or later on them can simply be upgraded, with no loss of user files.
- If your netbook is turned on, shut it down first.
- Insert the USB key you created in the prior steps, and press the power button on your netbook.
- When you see a splash screen press whatever key is appropriate for your machine to show the boot menu. For, for Dell it’s usually F12.
- Select the USB key from the menu and press the Enter key on your keyboard
In a few seconds, you will see a menu containing installation options, as follows:
Install Ubuntu Netbook Edition 10.x
Apply simple updates
- Do both 1 & 2
- Fast image (both 1 & 2, format user home, no prompts)
- Expert Options
- Note: If the system hangs on a flashing cursor while booting from the key, please see Model Specific Issues section below for instructions.
How do I use the quick recovery features?
One of the key features of this custom build is the ability to quickly recover from problems and restore the system to a default state. This process is relatively non-destructive, as all of the user’s files can be retained, should you so choose. To perform a quick restore, perform the following steps:
- If the machine is already off, press the power button to turn it on. If it is running, press the power button and choose “Restart” from the menu that appears.
- Immediately after you see the system’s splash screen the screen will go black for about 3 seconds – press ESC during those 3 seconds to enter the boot menu. Be prepared – you will only have 3 seconds to press the ESC key.
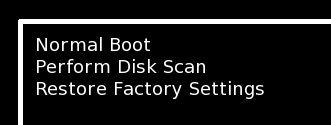
When you see the following screen, choose “Restore Factory Settings”
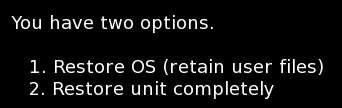
- After a few moments, you will see the following screen. Choose your option (usually will be “1”)
- Follow any additional directions on the screen.
In a few seconds (literally) your netbook will be reset to a standard configuration.
Special thanks to Jim Klein from Saugus Union School District for developing and sharing this method of modifying and restoring computers efficiently. Also thanks to Littleton Public Schools guru’s Joe Burneham, Mark Lindestone and Dan Mass for introducing this to the DoIT.
With immense gratitude and appreciate, the above images and quotes have been reposted from SUSD and the work of Jim Klein.
Credit: Photograph of uber kid

 LAUNCH (20 minutes):
 Divide teachers into four groups and have them rotate stations every 7 and 1/2 minutes. While there they discuss as a team how they have, could, or would use the technology to enhance learning.
 DEBRIEF (20 minutes):


